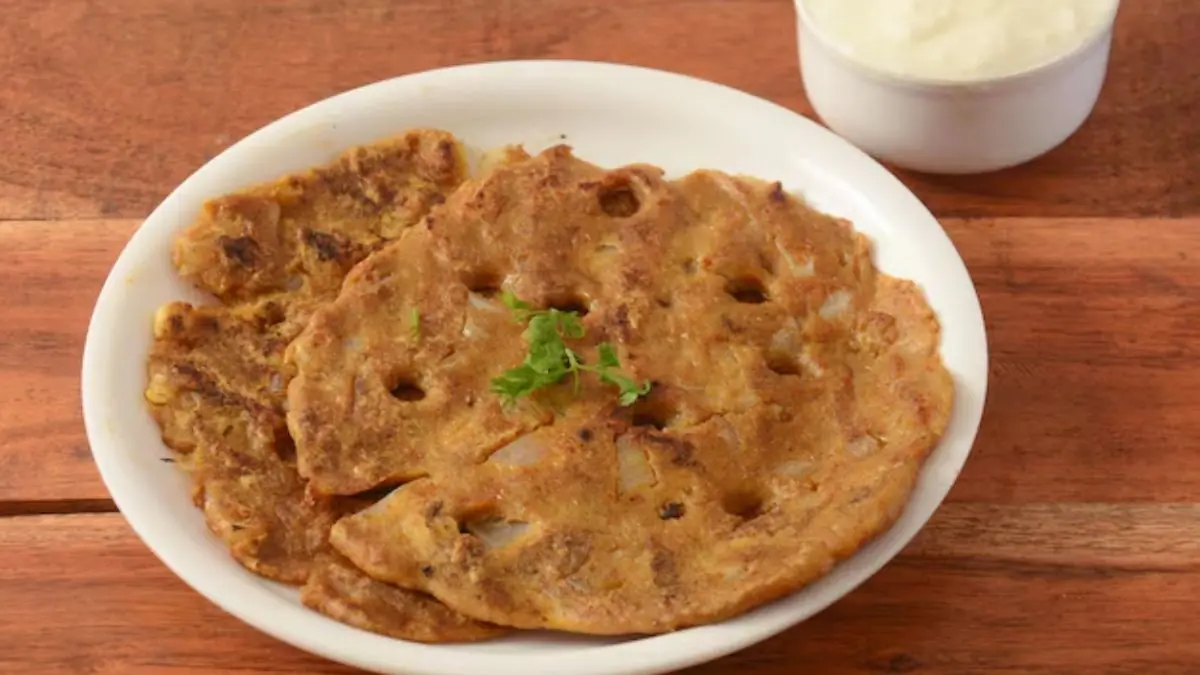
Maharashtian cuisine is known for its bold flavours, unique use of everyday ingredients, and traditional techniques to prepare delicacies. One such recipe is thalipeeth – a unique regional flatbread prepared with multi-grain flour and boasting holes made with fingers. It is slightly thicker than your everyday paratha or roti, but it is packed with nutrition and a variety of notes, depending on what you add to the dough.
If you have a variety of ingredients in your pantry, just not enough to make a whole dish, but they will be enough for this flatbread. The dough can be prepared using regular flour, legumes, millet flour, and common spices like cumin seeds, red chilli powder, and herbs like coriander leaves.
This flatbread does not need gravy on the side (but no harm if you serve). It’s a recipe for lazy weekends or hectic weekdays when you don’t want to cook many things but still want to relish a wholesome meal. Paired with yoghurt, butter, chutney, and pickles, thalipeeth ru
Maharashtian cuisine is known for its bold flavours, unique use of everyday ingredients, and traditional techniques to prepare delicacies. One such recipe is thalipeeth – a unique regional flatbread prepared with multi-grain flour and boasting holes made with fingers. It is slightly thicker than your everyday paratha or roti, but it is packed with nutrition and a variety of notes, depending on what you add to the dough.
If you have a variety of ingredients in your pantry, just not enough to make a whole dish, but they will be enough for this flatbread. The dough can be prepared using regular flour, legumes, millet flour, and common spices like cumin seeds, red chilli powder, and herbs like coriander leaves.
This flatbread does not need gravy on the side (but no harm if you serve). It’s a recipe for lazy weekends or hectic weekdays when you don’t want to cook many things but still want to relish a wholesome meal. Paired with yoghurt, butter, chutney, and pickles, thalipeeth rules the taste buds and satisfies hunger pangs. It is not only a popular flatbread in Maharashtra but also in nearby states, including Telangana and North Karnataka.
Interestingly, its origins are rooted in crafting a wholesome dish with nutritious elements in the pantry. It mirrors Maharashtra’s agricultural and rural way of living, where people seek not just food on a plate, but nourishing dishes that fuel their bodies with a lot of energy to carry out physically intense activities during the day.
In Maharashtra, a special kind of flour, called bhajani, is used – a blend of grains and legumes – making this flatbread rich in carbohydrates and fibre. It is usually prepared for breakfast or light dinners in households. Since the recipe does not include any cereals, it is also relished during religious fasts, but in a slightly different form. People make thalipeeth with tapioca pearls while fasting to elevate the texture and incorporate chewiness. It is a symbol of resourcefulness with which a home chef creates something fulfilling and gut-friendly out of scattered ingredients.